One thing that can make or break your navigation on your blog is your categories. When you are starting your blog you should draw out a road map for your categories. If you organize your categories on paper first then they will not get out of hand. If you have been blogging for a while and didn’t start your …
These are very basic instructions on how to install a plugin on your self-hosted WordPress blog or website.
Step 1: Click “Plugins” Step 2: Click “Add New” Step 3: Search for the plugin or kind of plugin you are looking for Step 4: Look for a plugin with a good rating Step 5: Click “Details” under the plugin you are looking at and read about the plugin Step 6: Click “Install Now” Step 7: Click “Ok” in the pop up prompt Step 8: You may need to login to install the plugin* Step 9: You will see the installation process run (can take a minute) Step 10: Click “Activate Plugin”
You can get this information in your hosting control panel or contact your host.
Additional Setup
Some plugins will need additional setup once you have installed them. You can look through your side menu in your WordPress Control Panel for the plugin and you will find the additional setup. Most good plugins will walk you through this setup.
Questions?
Please add your questions in the comments! I will answer you in the comments or via email.
Recently someone asked me where I got the code for my social media icons. I see a lot of blogs that use their icons wonderfully, yet there are a few bloggers struggling with how to set up their social media icons and how to make it look beautiful. Some sites you can’t find the icons because they are hard to read, too small, or too spread out. Worse yet some sites just don’t have any icons so readers are unable to connect to the blog and blogger.
Today I’m going to share with you how to choose your icons, where to find great icons, and how to add the icons to your blog.
How to choose the right icons for you.
Tip 1 – Keep in mind the style of your site. If you have a really clean and simple layout pick out clean simple icons. Icons that are hand drawn or “messy” will be distracting or look out of place. If you have a dark layout you want to make sure that your icons aren’t too dark and blend into the background and get lost. But you don’t want to pick out icons that are too light and stick out like they don’t belong there.Try to match the feel of your site. Try out a few different sets of icons.
Tip 2 – Find a set that has all the icons you need. Consistency is key here. If you choose all your icons from the same set you are going to make it easier for your readers. The group of icons will catch their eye and they will easily be able to identify this is where they can connect with you and your website! If you have one icon that isn’t from the set it will look like it was an after thought and ruin the feel of the rest of the icons.
Tip 3 – If you make money on your blog make sure that you choose an icon set that is okay for commercial sites. Usually the designer will mention this on their site or have it with the file.
Where to Find Amazing Icon Sets
I use a few different resources to find icons for me and my clients. One of the first places I go is Iconfinder.com, this is a searchable bank of icons where designers can get together and share their artwork! There are other icon search engines, but so far I like this one the best. They have a slide bar so you can select the sizes you want to look at. They also have a drop down menu for showing only commercial friendly icons. Also you can see what the icons would look like on a light background or a dark or if you have a patterned background or bright color you can use the grey button to make sure they have a transparent background.
Another tool I use to find icons is Google’s Image Search. Search terms you can use are “social media icons” or “social icons”. You will be able to find the sets because most designers use an image of all the icons together. When you see an image like that of icons that you like. Click on it. You should be then taken to the image in a window. Click out of the box and you will see the designers post about the icons. Or you may be taken to a design site that is talking about that specific set of icons or has a list of great icons. Have fun searching, designers are constantly adding more and better icons so I’m sure you will find something amazing!
How to Add Icons to your Site
Now that you have found a set that you like. Download the set and then pick out the icons you need (twitter, facebook, rss, etc). Upload your icons to your site or where you keep your images for your blog. Grab the URL of each icon.
Are you ready to quickly learn some basic HTML? I’m using twitter as an example but you will use this for each of your icons.
Now that you have your html code how do you add it to your site? If you are on WP you go into your widgets and add a text widget to your sidebar and enter your text. Blogger same idea only you use an html gadget on your sidebar.
I hope this was helpful to you and that you find some great, amazing and beautiful social icons for your site. If you were curious the set I use on my personal blog is from Productive Dreams and is called Page Peel. If you try this out I would love to see it on your site so add your link to a comment! Or if you found an icon set that you really love share it with me, I’d love to see it!
[box type=”info” style=”rounded” border=”full”]Originally posted on my blog at Uniquehorn Designs, but that blog will be closing and moving to PepperScraps.[/box]
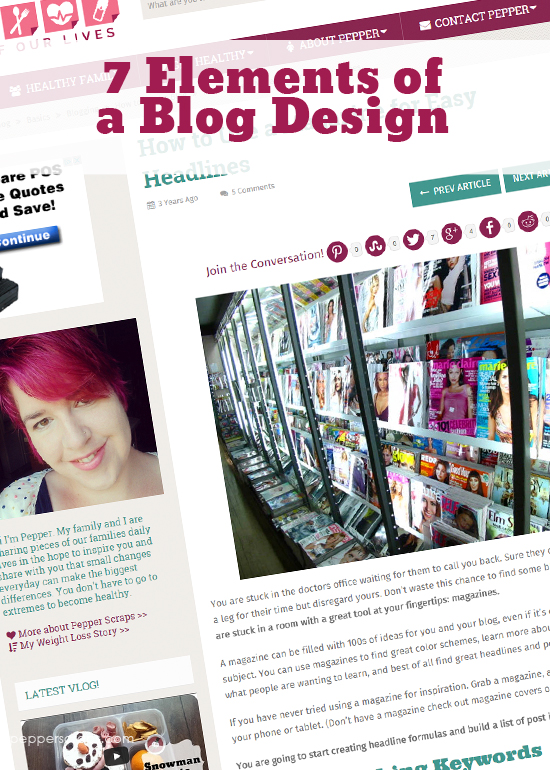
Have you really looked at your blog lately? Is it time to start freshening it up but you are not sure where to start?
Start by taking a look at the 7 major elements of your blog.
Logo
When someone is visiting your blog you have 3 seconds to give them their first impression (this is one reason you want your blog to load fast). A logo should tell your visitors in 3 seconds what to expect from your site. What’s the name of the blog and what is the style of the blog (ie. bold and bright, simple and clean, fun and crazy, crafty, etc.). You can say a lot in a logo.
You also want to make sure your logo is timeless and can be used for multiple kinds of media. Your logo should be able to be used for your blog, twitter background, facebook page, business cards, magazine articles, your pr package, an ebook, and more.
Think about the logos you see large companies using. When you see the Nike logo you recognize it instantly. When your readers and advertisers see your logo they should instantly know this is you!
The first thing when you come to the design of your blog is to invest in a professional logo.
After your logo the next major element to look at in your design is your header. Current trends are slowly changing from large headers to just logos. One reason for this change is because big headers are taking up important space on your blog with very little information. The second reason is that designs are becoming more simple and clean.
If you are a believer in above the fold theory, which usually I am not, you are loosing prime realty on your website with a large header. You could be loosing space that you could sell to your advertisers.
I believe that if you make your header interesting enough you can make it any size you want. But I also believe in keeping it simple and that is hard to do with a large header.
Sliderscan show off three or more of your best posts quickly and dynamically. You can find lots of themes with sliders built in or you can find a WordPress plugin that will add it for you. A slider can cause your homepage to load slower so you do need to consider this when considering adding it to your blog.
Navigation
Once you have gotten your visitors hooked into staying at your site longer than 3 seconds now you want them to take action and visit the other parts of your site.
For your navigation keeping it simple really is the key. You want your readers to instantly be able to tell that your menu is a menu. Make the buttons and links easy to read and easy to click.
Keep the menu items short and try to avoid being too cute. Use real words that a reader who has never been to your site will instantly recognize. Three items I recommend for every blog are About, Categories, and Contact.
But the most important thing of all is to make sure there is a home button or your header is linked to take them home. You don’t want your visitors to get lost on your site.
Posts
Posts should be easy to follow and easy to read. Make sure that you don’t overwhelm your readers with too many posts on the front page. If they are not going to connect to your blog within 10 posts then they just are not the right audience for you.
When you look at your posts they can be broken down to 5 basic elements:
Headlines – Headlines (or post titles) should be bold and easy to read. Most readers will scan through your headlines and pick out the articles that they want to read. Learn how to use a magazine to improve your headlines.
Post Footer – This is the place to put your meta data. Make sure that your tags and categories are listed so that when your reader finds an article they connected with they can find more to read.
Comments – Make sure your comment link is easy to find. Most readers expect to find the comment links at the bottom of the post. Plus it’s easier to click a link right after reading something you enjoyed then scrolling right back to the top.
Social Share Buttons – Make it easy for your readers to share your posts. Use a plugin that gives you each of the social media sites that you want people to connect with your posts. Try and make sure all the share buttons are all in one place. Also do not over do the options. You don’t want to overwhelm your readers with options and buttons.
Sidebar
A sidebar is a place to share more additional information about you, your blog, and your advertisers. Sidebars are one of the biggest struggles for bloggers, they are fighting the constant battle of clutter.
More than this can start making your site look busy or cluttered. Again white space is very important in your sidebar. I have written a post about sidebars in my post How Much is Too Much? Let’s talk sidebars.
Footer
If you have an editable footer then this is a great place to put items like your tags, categories, and extra buttons. I would not put more than four sections in your footer and only place one large item in each section.
The Next Step
Now that we have reviewed the 7 elements of a blog it’s now your time to take a look at your blog and see what needs updating and cleaning.
If I’ve talked about a section in your blog that your just not sure what to do with subscribe to my blog. I will be breaking out each of these elements into their own posts and you can learn more how to improve your blog or website.
If you have any questions you want to ask right away please post them in my comments.
Investing in your website can be costly. But if you want your readers and advertisers to invest in you, you need to make an investment.
After making the decision to start redesigning you may find that the cost is outside of your current budget. This may make you feel that you need to put off your redesign or not do it at all. But before you put off your new look consider this:
Consider slowly investing in your design. When you look into breaking the design down piece by piece you will find that you can slowly afford an amazing design.
Before you Start
Just as Leo Babauta talks about branding your blog’s personality as a whole in Branding 101, you need to think about how your new look represents you also. Really draw a picture in your head of what you want and what really represents you and your blog.
You want to look at your design from the start as a whole, not as each element as you invest, because in the end you want it all to fit together seemlessly. You will also want to make sure you use the same designer throughout your design.
Picking your Designer
That brings us to our next step which is to find a designer that fits you and your style. You can do this by interviewing them, checking out their previous work and asking for a mock up.
One of things to ask while interviewing them is if they would be willing to spread your project out and how they would recommend going about this.
Don’t skimp on your choice of designer just because of their prices. A true professional designer is going to have a high prices due to their skill level, their education, their investment in computers and programs, and their demand. But you will see something different in a designer that is charging a premium price. They are going to spend the time to get to know you and your product and your vision. They are going to give you a premium product that will amaze you and your readers.
Breaking up the Cost
So how do you break up a new design?
You can break each element out and spread them apart to help you make your slow invest. You can get the prices for each element from your designer and how they would prefer to break it up.
A good example of how you can break up your design is to first invest in a professional logo, then a blog header, maybe a twitter background and a facebook page, and then finally a customized theme.
Logo Design – Your logo is going to be used on everything from your site to your business cards and it will nail down the feel of the rest of your design.
Header Design – You may actually find that you don’t need a header design when you are planning your overall design. Some magazine themes and professional sites are now mainly using their logos as a header and leaving more room for content on their site. This is one reason it is a good idea to have a plan before you start.
Twitter Background and/or Facebook Page – When planning out your overall look think about the different elements you will need for your site and each piece that you will need. I highly recommend you have all your social media match the design and feel of your site.
A Customized Theme – You have lots of different options when it comes to your theme for you blog. Learn about the different levels of investment you can make in your theme design in my previous article, Beauty vs Budget.
As you purchase each piece of the design make sure you are saving up for the theme design, because this will be the largest investment. But this way you will be able to slowly make the changes to your site, your readers will see your investment and start recognizing your new brand!
Payment Plans
Another option to consider is payment plans. Ask the designer that you are interested in if they would be willing to take your project on with a payment plan.
They may do this in a few different ways. They may wait to start the design until you have paid in full or half down. They may be willing to design while you make your payments but will not release the files until everything has been paid.
Make the Plunge
When you are ready to take your site to the next level make sure that you choose a professional designer and don’t be afraid of their prices. Because you will be surprised at your return on your investment if you make the plunge. A truly well designed site will drive in the readers and investors as you would never have imagined.
If you feel that a professional designer that you love is out of reach think again and consider your options and consider slowly investing into you new design.
More Questions?
I’m always happy to help with questions so feel free and ask here in the comments or email me at (unicornbeauty (@) gmail.com)
An awesome project is starting up over at theBlogFrog and the SITS Girls Community. Nirvana Mamma is inviting everyone to group up and do ProBlogger’s Build a Better Blog in 31 together! If you are like me you may have considered doing Problogger’s Build a Better Blog program, but felt like you would lose your …


You must be logged in to post a comment.