
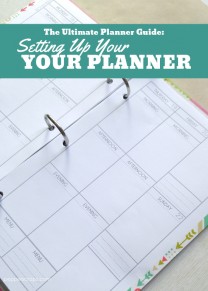
Today for the Ultimate Planner Guide I’m going to share how to set up the PS Planner. The PS Planner is a printable planner that fits into a A5 binder. If you missed yesterdays post you can learn more about the essential planner supplies I recommend for your planner.
This post contains affiliate links.
Supplies for Setting Up Your Planner:
- A5 Binder
- Printable Planner
- Scissors or Paper Trimmer
- Hole Punch
- Washi Tape
Step by Step Instructions for Setting Up Your Planner:
Click the images below to see step by step photos

Step 1: Measure paper to find center. Should be 5 1/2″.

Step 2: Cut paper with paper trimmer or scissors

Step 3: Organize pages into correct order.

Step 4: Measure where you need holes or use a template as your guide. I used planner filler paper.

Step 5: Punch holes.

Step 6: Line outside edge of papers up. This is the side without holes. Make sure your washi tape is longer than your page.

Step 7: Place washi tape on front page. You want it to hang off about half way.

Step 8: Fold washi tape over press down from center out.

Step: 9: Make sure washi tape is sealed on both sides. You can use your nail to push out bubbles.

Step 10: Trim off edges.

Step 11: Place your pages into your binder!
- Step 1: Measure paper to find center. Should be 5 1/2″.
- Step 2: Cut paper with paper trimmer or scissors.
- Step 3: Organize pages into correct order.
- Step 4: Measure where you need holes or use a template as your guide. I used planner filler paper.
- Step 5: Punch holes.
- Step 6: Line outside edge of papers up. This is the side without holes. Make sure your washi tape is longer than your page.
- Step 7: Place washi tape on front page. You want it to hang off about half way.
- Step 8: Fold washi tape over press down from center out.
- Step: 9: Make sure washi tape is sealed on both sides. You can use your nail to push out bubbles.
- Step 10: Trim off edges.
- Step 11: Place your pages into your binder!
Follow the Series: The Ultimate Planner Guide


You must be logged in to post a comment.